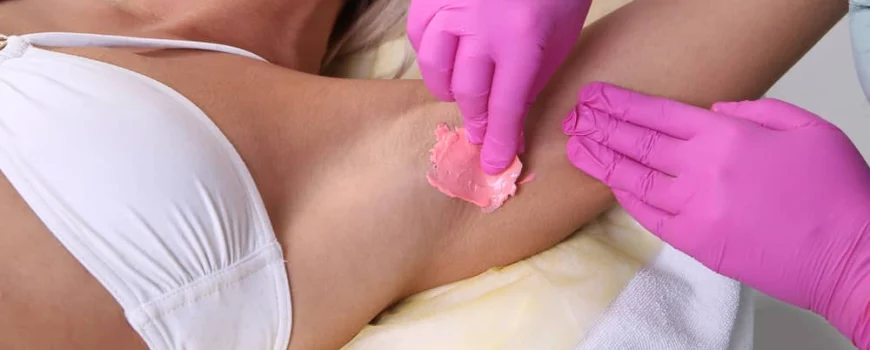
Beauty technician applies pink wax to client’s underarm for hair removal

Discover the Benefits of Armpit Waxing for Smooth, Flawless Skin

For many women, getting rid of underarm hair is a regular part of their daily routine, and shaving is a popular method. While shaving can help keep the underarm area looking fresh and smooth, it doesn’t pull the hair from the root and may even encourage faster hair growth, meaning more frequent upkeep is required.

Shaving can also irritate the underarm area and sometimes leave behind a stubble-like look that might be noticeable. Because of this, many women look for other options, and waxing has become one of the most favored ways to maintain smooth underarms.

In this article, we’ll talk more about what waxing is and the benefits of armpit waxing.

What is Waxing?

Benefits of Armpit Waxing

Waxing is a way to temporarily remove hair by pulling it out from the root. Fresh armpit hair won’t start growing again in the same spot for two to eight weeks, and almost all body parts can be waxed.

Waxing your underarms often slows down how fast the armpit hair regrowth happens between sessions, which is something shaving cannot do.

Why Choose Underarm Waxing?

Waxing your underarms has the same perks as waxing any other body part. Since removing hair means pulling right from the root, it takes a much longer time to reappear. You’ll likely stay smooth and have hair-free underarms for at least two weeks. Also, pulling underarm hair from the root can weaken the follicle over time.

This damage makes the hair regrowth become finer and softer; in some cases, it may stop growing completely. So, the more you wax, the less armpit hair you’ll have to deal with in the future.

But if you want bare underarms, it will take a little work. Waxing your legs or other body parts at home can be pretty simple, but doing your underarms can be trickier because using both hands properly is hard for a good result. Thus, it’s best to visit a well-reviewed salon and let a professional handle it.

Benefits of Armpit Waxing

There are multiple reasons why you might want to start waxing your underarms, with some of the most common being:

Less Need For Shaving

Shaving your underarms is a much more regular way to deal with underarm hair. The biggest advantage of armpit waxing instead of shaving is the time it saves; the results last longer.

Plan to wax your underarms every 2 to 4 weeks, based on how fast the hair growth is. However, many people need to have their shaving done almost every day.

Waxing Totally Removes Underarm Hair

Waxing removes hair by pulling out underarm hair by the root, something shaving is unable to do. Depending on the type of blade you use, some small hairs may still remain in the armpit and cause razor bumps.

When you wax, it is a complete hair removal process, but shaving only trims it down.

Prepare For Big Events

Think about weddings, fancy gatherings, or even that must-attend Christmas party night. These moments often call for a strapless or sleeveless outfit, which means your underarms will be visible.

Having any armpit hair or a stubbly look in that area can make many women self-conscious on such occasions, but waxing gives a clean, smooth result—perfect for raising your arms and dancing freely.

Waxing Preparation Tips
Illustration with waxing preparation tips for better and smoother results

As with any other type of skin treatment, your results will depend on how well you prepare beforehand. This is especially true with body waxing, as your hair must be a certain length, and your skin must be properly prepped. Here are some waxing preparation tips to get you started:

Take A Shower Before Your Session

Sweat from your underarms tends to be thicker than sweat on other body parts. Plus, this area is more likely to accumulate bacteria. Be sure to arrive at your waxing session feeling completely fresh and clean. Use a gentle soap or body wash to prevent any extra skin irritation.

Also, using warm or hot water helps soften the armpit hair and slightly open up the pores, making the whole process much smoother. And remember, skip the deodorant after! It will only interfere with how well the wax sticks.

Let Your Hair Grow

One of the most common problems we encounter at our waxing salon is clients who don’t have enough hair growth for us to remove. Short stubble isn’t long enough for the wax to adhere to, so we need the hair to be at least 0.5 – 1cm long.

So, if you’re planning a beach vacation or going somewhere romantic for your anniversary, plan and let your hair grow out for a few weeks beforehand.

Exfoliate Beforehand

We can’t emphasize this tip enough—exfoliating is the key to ensuring your hair emerges rather than getting trapped under the skin and turning into painful bumps, otherwise known as ingrown hairs.

Exfoliating before your waxing appointment ensures that the hair grows evenly and can help the hair reach the ideal length faster. Before your appointment, shower and thoroughly exfoliate the area, but don’t use a harsh soap or scrub too hard.

Stay Away From Moisturizers & Creams

Your skin must be dry and clean for the hard wax to grip the hair well. After you exfoliate in the shower, refrain from using moisturizers, creams, or salves, as these products make it harder for the wax to take hold.

Arrive at your appointment clean and dry; your waxing technician shouldn’t have a problem removing your unwanted hair.

Avoid Sun Exposure (And Skip The Tanning Bed)

One big mistake people often make when preparing for an important event is getting a tan before having a professional waxing session. Spending time under the sun or inside a tanning bed can make your skin much more delicate, especially if you end up getting burned.

Add wax to this, and you’ll be in a world of pain (and peeling), so we recommend waiting a few days after your waxing appointment to get your tan on.

Spray tans are a different story. You won’t be in pain if you get an airbrush tan before your body wax, but the wax might remove some fake tan, resulting in blotchy skin.

If you plan on getting a professional wax and a spray tan, do the waxing first, then wait a day or two before you visit the tanning salon.

Take Some Ibuprofen

Some people have a lower pain tolerance than others, which is especially common for clients who have never had a professional wax.

If you are worried about your Brazilian wax, underarm wax, or any other type of wax being painful, take one or two Ibuprofen with food before your appointment to minimize any discomfort you may experience.

The great thing about body waxing is that it’s quick and easy, so any pain you feel will only last a second or two after the hard wax strips are removed.

Waxing Aftercare Tips

Waxing aftercare is just as important as waxing preparation, especially when preventing skin irritation and ensuring the hair grows back evenly. Here’s what our waxing technicians recommend:

Don’t Shower, Swim, Or Sweat

Your skin will need a little time to recover after a professional wax, so we recommend not showering, swimming, or sweating for at least 24 hours after your appointment.

Exercising may cause friction on the freshly waxed area, which can cause your skin to become red and irritated. Sweat can also clog your pores, which contributes to irritated skin right after a wax.

Something else to be careful about is the chlorine and other strong chemicals in pools and hot tubs. To avoid skin irritation, we advise that you avoid submerging the area in pool water for a day or two after your waxing appointment and refrain from applying sunscreen, tanning lotion, or bug spray.

Lay Off The Skin Products

In addition to avoiding sunscreen and bug spray, our waxing technicians recommend not using any skin products on the area until a day or two after your appointment. Some skin products contain chemicals, fragrances, and other skin irritants, so it’s best to refrain from using certain moisturizers, cleansers, and other products on your skin until the area has had time to calm down.

For example, if you have had an armpit wax, don’t use deodorant, and if you’ve had an eyebrow, chin, or lip wax, stay away from makeup until the coast is clear.

Stay Out Of The Sun

Remember what we said about tanning before your underarm waxing appointment? The same goes for after you’ve had the hair removed. Your skin will be extra sensitive after you get a professional wax, so it’s best to avoid exposing the area to the sun for a day or two after your appointment.

Trust us — the last thing you want is a sunburn on your freshly waxed skin!

Don’t Shave Or Pluck to Prevent Ingrown Hairs

Waxing isn’t a permanent underarm hair removal method. That said, your hair will grow back every three to four weeks, and you’ll need to schedule additional appointments if you want to remain hairless.

Avoid shaving or plucking the hair between appointments, as this will throw off the growth cycle and result in ingrown hairs. If left alone, waxing process results in hair that is softer and doesn’t grow back as thick.

How Long Will The Waxing Last For Your Underarms?
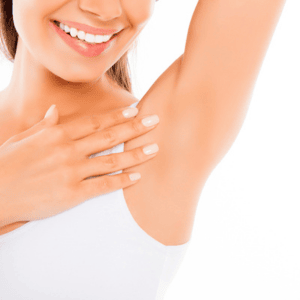
Smiling woman touching her smooth, hair-free underarm after waxing treatment

Waxing results differ for each person because hair grows at different speeds. However, after your waxing session is finished, you can generally expect smooth results to last between 2 and 4 full weeks.

Waxing is a fairly fast beauty treatment. A complete underarm waxing session takes about 10 minutes, which makes it a great option for people with busy schedules who need quick beauty fixes.

This also helps you schedule your waxing sessions before nights out or important occasions to treat the necessary area just in time for the event.

When You Shouldn’t Wax

Pregnant woman pointing at her underarms, emphasizing safe grooming methods

Not everyone is a good candidate for waxing. You might need to try another underarm hair removal method if any of these situations apply to you:

• You’re pregnant. Waxing is generally safe, but pregnancy hormones can make you and your skin much more sensitive.

• You have ingrown hairs or cuts. These can make the area more prone to irritation and raise the risk of infection.

• You’re on your period. Skin tends to become a lot more sensitive when you’re menstruating, which can make the waxing process more uncomfortable.

• You’re taking certain medications. These include hormonal treatments (such as birth control), antibiotics, oral acne treatments, and topical retinoids (such as Differin or Retin-A). Be sure to check with your doctor first, as these medications can increase the risk of irritation from waxing.

Get A Professional Wax In Waco

Now that you know how to prepare for hard wax and care for your skin afterward, it’s time to book your next underarm waxing appointment!

If you have any questions about waxing, please don’t hesitate to contact our waxing technicians at On the Avenue Salon. We’d be more than happy to provide additional tips and advice and help you schedule an appointment at our waxing salon. Contact us today to get started!
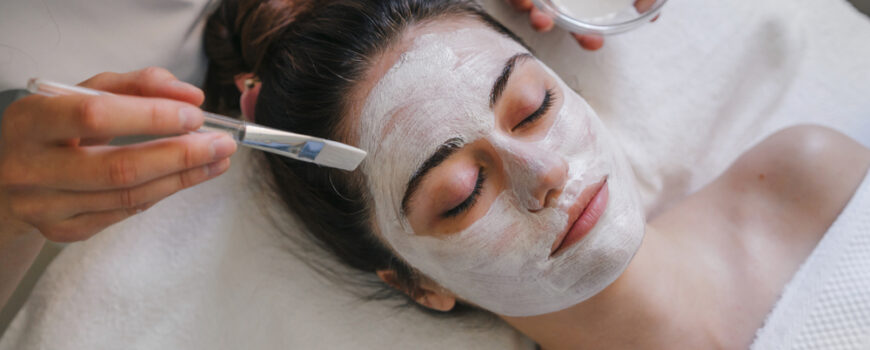
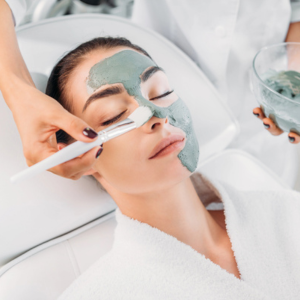
Woman receiving a white facial mask applied with a brush at a spa

Discover the Top Benefits of a Facial for Healthier Skin

Have you ever wondered about the benefits of a facial? Facial treatments help thoroughly cleanse the pores on a much deeper and more effective level. When pores are not regularly cleaned properly, they often stretch and expand with excess oil and debris buildup. Extractions, combined with regular facials performed by your skilled professional skin care expert, will aid the skin in retaining hydration and enable greater absorption of professional products.

As much as we love the sun’s warm glow, prolonged exposure causes damaging wrinkles and age spots on our skin. Regular facials help even skin tones and lighten dark spots.

The facial experts at On the Avenue Salon will listen to your specific concerns and skin problems and create a treatment plan specially designed around your individual preferences. This will allow you to truly love the skin you are in!
What is a Facial?

Benefits of a Facial

A facial involves a sequence of skin care treatments that exfoliate and deeply cleanse the skin by efficiently eliminating impurities and dead skin cells. It is typically carried out in beauty salons, upscale day spas, and even at the medical office of your dermatologist. Some dermatologists hire estheticians to work in their private practice.

A facial treatment usually differs from provider to provider. It can be as comprehensive as one where you receive a full body massage in the package or others where you are provided only with the basic treatments.

A facial treatment generally includes steaming, exfoliation, and extraction. Other providers may add facial masks, peels, and relaxing facial massages. It depends on the package you decide to purchase and your specific provider.

What to Expect From a Facial

The goal of a facial and the type of skin it is appropriate for should be outlined in the spa treatment menu. If you have any questions about which one to book, you should speak to a therapist at the spa and ask for their expert advice about which skin treatment would be the best for you.

Preparation

The therapist will gently remove your makeup as part of the treatment process so you can arrive without special preparation. You will typically receive your facial in a spa while lying down on a comfortable massage table.

Products

Your skilled therapist will carefully apply various skincare products to your skin. She may use a brush or spatula to apply products such as face masks, while she is likely to use her hands to massage cleansing creams and facial oils.

Your therapist gently removes the skincare products using damp cloths or towels, usually warmed up first.

Facial Massage

Many facials include a type of facial massage, which often extends to the neck, shoulders, and head, as well as the arms and hands. Facial massage usually involves acupressure techniques and lymphatic system massages.

Duration

A complete facial typically takes 60 to 90 minutes. An express facial generally lasts approximately 30 minutes and consists of the regular cleanse/exfoliate/tone/treat/moisturize routine.

However, unless otherwise stated, it is unlikely to include any specialist equipment or techniques.

Benefits of a Facial Treatment

Cleanse Your Skin

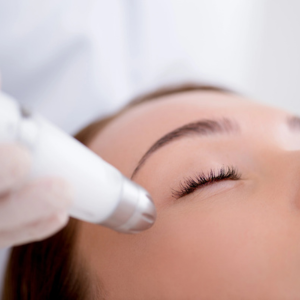
Close-up of a woman undergoing a skin rejuvenation procedure with a handheld device

An excellent facial thoroughly cleanses your face, which is impossible at home. Think of it this way—you have all the medicines at home, but you still need to visit your doctor annually.

The facialist knows exactly your unique skin type and understands what needs to be done to keep it looking healthy and in good shape. They utilize steam to open up your pores and thoroughly cleanse your skin.

Prevent Aging and Promote Collagen Production

Let’s face it—you are not getting any younger each day. And since you have only one face, you must take proper care of it. Regular facials and soothing face massages boost cell regeneration and encourage collagen development, giving you younger-looking and vibrant skin.

Rejuvenate Your Skin

With age, your skin loses its luster—that’s natural. Your daily lifestyle choices and environmental pollution make it difficult for your skin to recuperate fully.

Facials can significantly help rejuvenate and relieve dehydrated skin. The therapist or facial expert utilizes various methods, specialized products, and advanced technology to improve skin texture.

Facials Help Detoxify The Skin

Illustration explaining how facials help detoxify and rejuvenate the skin.

Your skin must regularly eliminate the waste that builds up on its surface. If this process is not completed properly, it results in unsightly breakouts. This is exactly why a skin detox is so necessary.

In addition to cleansing and thoroughly washing your face every single day, you should also have facials to effectively detoxify your skin and achieve optimal skin health.

Aestheticians utilize various ingredients such as antioxidant-rich creams, sea salt, herbal extracts, and nourishing oils to leave your face feeling fresh and looking radiant.

Treating Acne And Acne Marks

You risk scarring your skin when you squeeze a pimple (or any acne). Acne marks can be quite stubborn, but facials can help you treat them effectively.

Aestheticians often utilize products that contain salicylic acid to treat acne successfully. A study shows salicylic acid peels help reduce acne and the resulting scars.

Eliminate Whiteheads And Blackheads

Extraction is an important procedure for your face. An experienced individual utilizes the extraction tool to carefully eliminate all whiteheads and blackheads without harming your delicate skin, which cannot be effectively done at home.

Blackheads and whiteheads block the pores and cause your skin to appear dull and lifeless. Therefore, if your skin seems uneven and bumpy, it’s time for a rejuvenating facial.

Unclogs Pores

It’s very challenging to avoid all the pollution and harmful damage caused by environmental free radicals in our surroundings. Your skin is constantly bombarded with harmful UV rays and toxic substances daily.

These accumulate on the surface and effectively clog the pores. During a professional facial, the expert uses steam to gently open up the pores and remove all dead skin cells, thus preventing acne and various other skin issues from developing.

Exfoliate and Maintain Clear Skin

Exfoliation is the gentle process of removing dead skin cells from the skin’s surface. The skin cells eventually die and accumulate on the outer layer (if they are not removed), making your skin feel rough and dry.

While it is possible to exfoliate your skin using a scrub at home, a professional facial is the best alternative to treat active skin cells effectively.

It involves using chemical peels that deeply cleanse the skin surface, uncovering a fresh, healthy layer of skin beneath.

Smooth Fine Lines and Tighten Your Skin

There’s no denying that facials reduce fine lines. As you get old, the skin loses its natural elasticity as collagen production decreases.

During facial treatments, professionals utilize chemical peels, face packs, masks, lotions, and creams enriched with beneficial botanical extracts to boost collagen production and minimize the signs of premature aging.

Facial Masks Help Make Your Skin Soft And Glowing

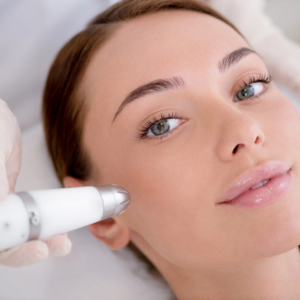
Smiling woman receiving a skin treatment with a microdermabrasion device

The skilled esthetician carefully prepares a mask specially designed for your unique skin type. The nourishing mask hydrates the skin deeply and refines the pores effectively.

It also contains beneficial ingredients that diminish hyperpigmentation and help firm the skin nicely.

Boost The Absorption Abilities Of Your Skin Cells

Another benefit of getting a facial regularly is that it boosts your skin’s ability to absorb other beauty products effectively. You might be spending a considerable amount of money on various cosmetic products yet realize that your skin isn’t absorbing them properly.

Why is that? Your skin’s surface is quite rough, making it unable to permeate these products effectively. With consistent facials, your skin becomes smooth and better prepared to absorb the products.

Receive Expert Care for Your Specific Skin Concern

Facials come with valuable expert insights and advice. Before any facial treatment, the experienced esthetician asks about your specific skin conditions, skin type, concerns, and what issues you want to address effectively.

They carefully examine your skin and analyze the problems before providing a solution. They select products and treatments that are particularly beneficial for your skin type.

Help You Achieve An Even Skin Tone

Concerned about those dark patches appearing on your skin? Those are simply areas of melanin that give your skin and hair their natural color. Aging, excessive sun exposure, and hormonal changes may produce excessive melanin, resulting in dark spots.

Monthly facials work to even out those dark spots, leaving you with a healthier and balanced complexion.

As we have discussed, facials offer numerous benefits. Are you curious about how often you should schedule one? It is always wise to consult with an esthetician regarding how often you should have your facial routines.

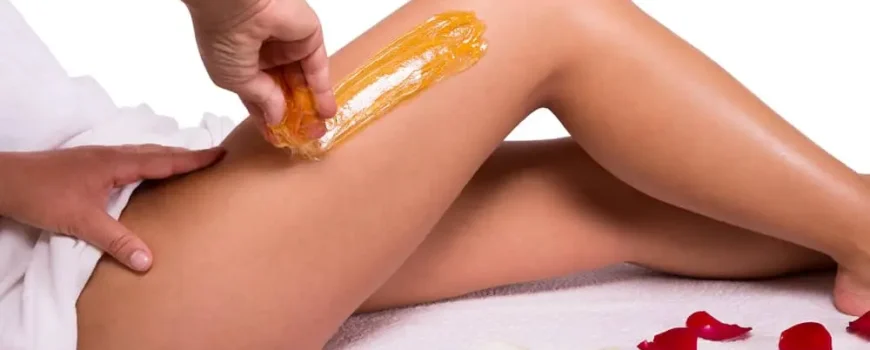
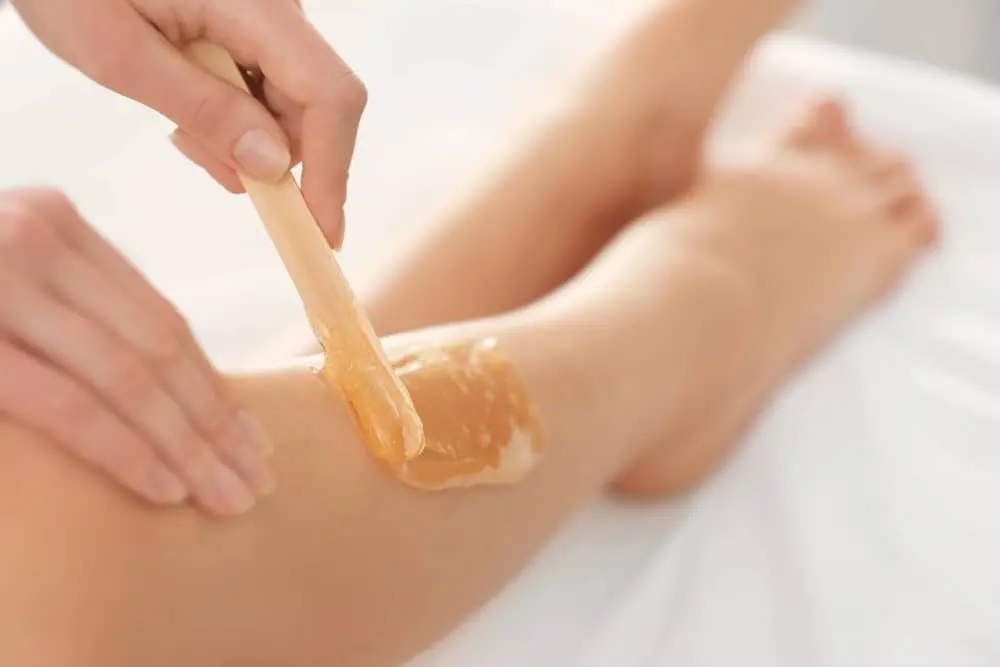
a shot of wax being applied on thigh

The Best Types of Body Waxing: Your Complete Guide to Hair Removal

Waxing serves as a thorough hair removal solution that is suitable for both men and women alike. Many people tend to appreciate the advantages of waxing because its results last much longer than those of other hair removal methods available today. However, you probably have a lot of questions if you are new to the world of waxing. This comprehensive guide to waxing covers what waxing is, the types of body waxing, and the facts you need to know about waxing.

Types Of Body Waxing And How Waxing Works

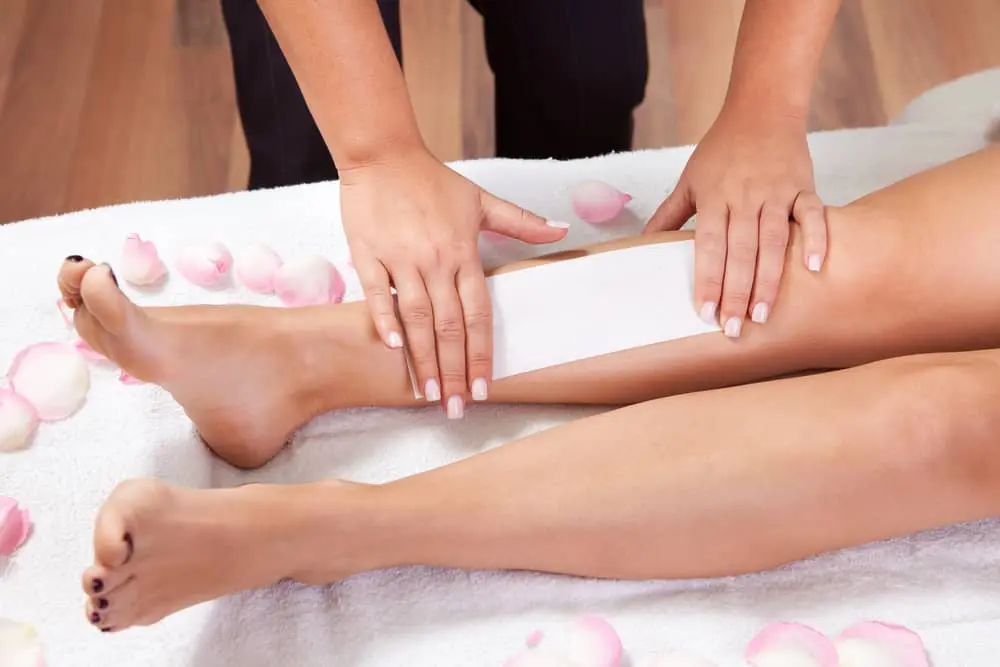
wax being applied on a woman's shin

Waxing functions by pulling the hair out from the root. The majority of individuals can undergo a type of waxing session and appreciate the benefits as long as it is performed by a professional.

There are two primary categories of wax: hot wax (which includes both hot wax and strip wax) and cold wax. Each of these varieties comes in various scents and colors.

What Is Hot Wax?

As the name indicates, hot wax is heated to a temperature range between 40 and 50 degrees Celsius. It is subsequently applied to the skin with a wooden spatula. The therapist allows the wax to cool and harden completely before pulling it off, along with the unwanted hairs.

One specific type of hot wax is called strip wax. Again, the hot wax is spread over the area that is being treated. The therapist then places a disposable strip over the wax and patiently waits for it to cool down.

Once cool, the therapist removes the strip, bringing the wax and hair. The warmth and density of hot wax cause the pores to open a little more, making the wax more effective at removing all of the hairs at once.

Hot wax versus strip wax: There is a long-standing discussion regarding hot wax compared to strip wax and which one is superior. When performed by a skilled professional, both options can lead to an outstanding hair-free result.

It depends on which area is being waxed and the client’s preference. Usually, strip wax is highly effective for larger body areas, such as legs, back, and arms, where the skin tends to be less sensitive. Hot wax is good for sensitive areas, such as the bikini area, where hair is thicker.

What Is Cold Wax?

Cold wax is available on strips designed for a specific body area, such as the upper lip. These strips are placed on the area and then pulled off quickly. They are generally used for at-home waxing but are less effective and usually require multiple repetitions.

There are some people who we recommend to choose a different form of hair removal. Individuals who suffer from hypersensitive skin, hemophilia, and diabetes should choose different options. If you have sunburn, a rash, or any contagious skin condition, you need to wait until your skin is healthy again.

If you are currently undergoing electrolysis treatment, please avoid getting waxing in the same area. We will cover waxing during pregnancy and during your period later in this helpful guide.

How Long Does Waxing Last?

The duration that waxing remains effective relies on the specific area of the body and the rate at which your hair grows back. For instance, when clients inquire how long leg waxing will remain effective, we typically suggest they anticipate enjoying smooth legs for six weeks.

In the case of bikini waxes, it generally lasts around three to four weeks. After a waxing treatment, you will learn how long your waxing results last and when to schedule your next treatment. The frequency of waxing is a personal choice, but our waxing therapists usually notice clients prefer to wait 4-6 weeks between treatments.

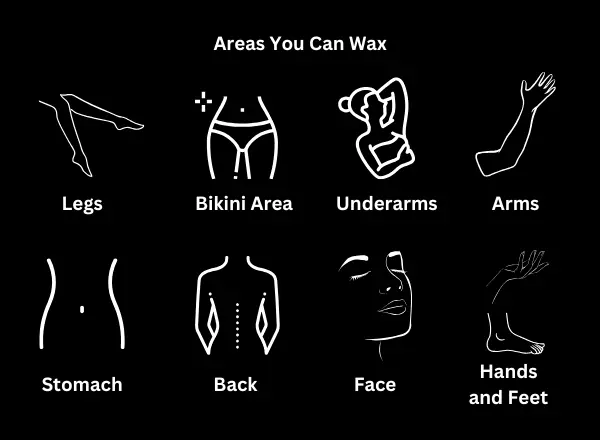
Where Can You Wax?

types of body waxing

Legs

This is clear, as many individuals wax or shave their legs for smoothness. Various methods are available to accomplish this, and many individuals prefer shaving instead of waxing due to the discomfort usually linked with waxing.

However, once you begin doing it consistently, it will probably start hurting less over time.

Bikini Area (Pubic Hair)

If legs are the most commonly waxed area, the bikini line is likely the second most popular choice among individuals. Bikini waxes are well-known for being extremely painful, and waxing your bikini area can be challenging for many. However, when done by a professional, it can make for a much better experience at the beach.

1 . Classic Bikini Wax

A basic bikini wax typically only removes the hair visible around the bikini line. Some hair may remain and can be creatively sculpted into a landing strip, triangle, or other style options. If you are a waxing newbie, this is your best bet.

2 . Mini Brazilian

A mini Brazilian bikini wax treatment removes the hair from the front area, leaving it bare and smooth. When you go for a mini Brazilian, you should be prepared to lay comfortably on your back with your legs bent and feet pressed together, similar to a butterfly position. From that point onward, it’s all about maintaining steady breathing and anticipating the application of wax strips until the entire job is finished.

3 . Full Brazilian Wax

The full Brazilian wax is similar to the mini Brazilian wax, but the backside area is also waxed. Now, this is where things get a little more intimate (as if being pantsless and completely spread eagle wasn’t already so awkward). To access the backside area—a.k.a. your butt crack—your technician will generally follow one of two methods. You’ll either lift one leg at a time so that a quick strip can be quickly ripped away, or you’ll turn over onto all fours. I hope you are not feeling shy!

Underarms

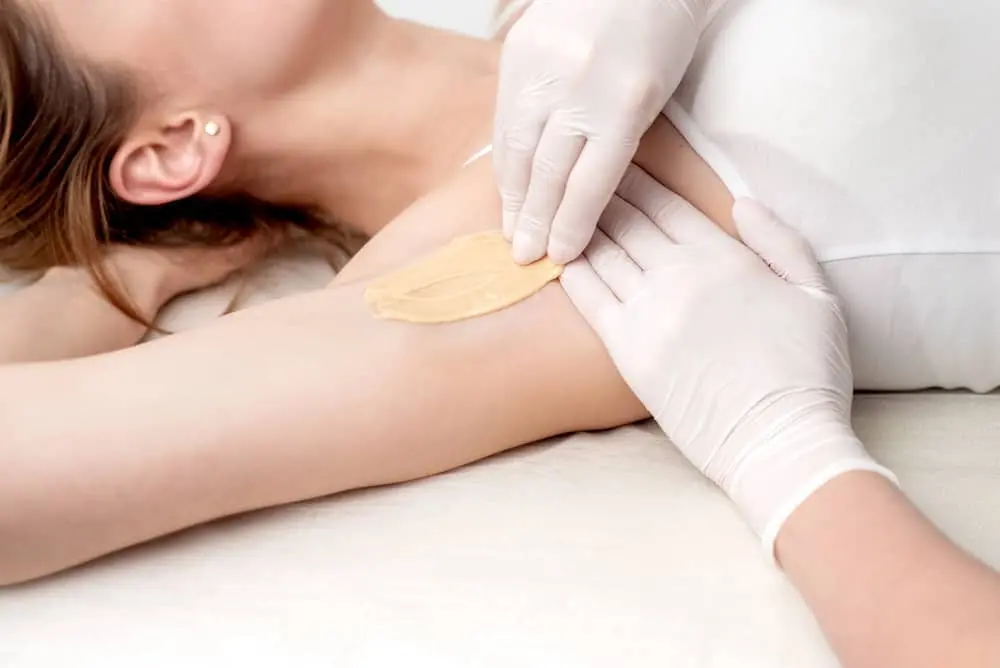
wax being applied on the underarm of a woman

This is yet another very well-known location for hair waxing services, even though many individuals choose to shave their underarm hair instead of waxing. You will generally want to hand this task over to another qualified professional.

While you can perform it yourself, you will want to stretch the skin effectively before you remove the wax, and it is much easier for another person to do that for you.

Arms

Like waxing the legs, many people opt not to use this method. For most individuals, arm hair is thin and not noticeable, so it doesn’t pose a problem. However, wax your arms and legs if your arm hair is coarse or dark.

Stomach

Many individuals who wax their bikini area will also choose to wax their stomachs, and even those who don’t wax their bikini area will likely want to remove some of the hair on their stomachs. Typically, you will only wax the hair right along the top of your bikini area. This may not be worth the effort for individuals with light or fine hair, as stomach skin is often sensitive, but those with dark or coarse hair might want to consider it.

Back

The back area usually has a fair amount of hair, particularly near the lower part. Unfortunately, this area is also one of the hardest places to wax effectively. If you plan to wax your back, you will need assistance because attempting to pull off the wax by yourself rarely works.

Face

You can easily wax your upper lip and eyebrows, significantly simplifying your makeup routine. Be careful the first time you wax your eyebrows, and remember to go slowly. You can always take off a bit more hair, but you definitely can’t put it back on.

Hands and Feet

Although you might not think about it, you can grow some pretty coarse hair on the knuckles of both your hands and feet. Because of this, some people wax their hair off, especially if it’s particularly dark.

Does Waxing for Hair Removal Hurt?

wax being applied on a woman's leg

Waxing is a method that involves pulling the hair straight from the root, which tends to be more painful compared to other hair removal methods.

However, this varies based on several factors, and most of our clients say that the discomfort they feel often improves over time, quickly fades away, and is ultimately worth it for the smooth finish they achieve.

The level of discomfort someone experiences is also influenced by the skill and expertise of the therapist performing the waxing. At On the Avenue Salon, we ensure that all our therapists are professionally trained and understand how to minimize clients’ discomfort, even those with sensitive skin. The more consistently you wax a specific area, the less uncomfortable it will be in the long run. A helpful tip is to take ibuprofen, if you can, about 45 minutes before your scheduled treatment.

Preparing To Be Waxed

If you have decided to get a wax, you likely have many questions about preparing for it properly. Pick a qualified and experienced beauty therapist. This does not mean you are required to go to a salon. You will feel much more at ease and relaxed getting the wax done in your home. Additional preparation is also needed. Stay clean, and your aesthetician will discuss what they need you to do. Many clients like to exfoliate the area a few days ahead of the waxing session to enhance the results and loosen any ingrown hairs.

Do you need professional waxing services? Please reach out to us to book an appointment!

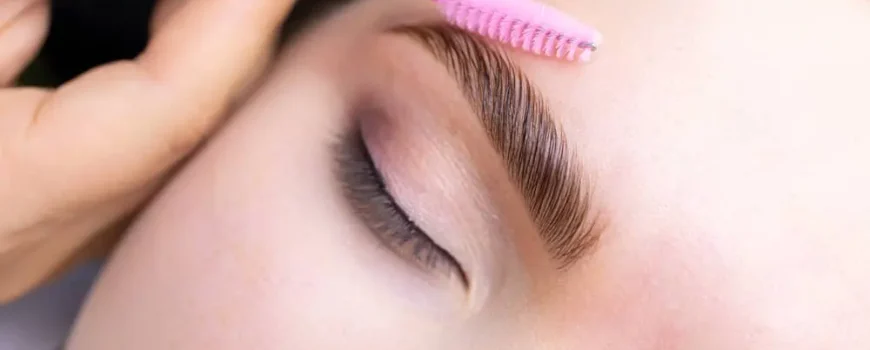
Brow lamination is essentially a perm but specifically designed for your eyebrows

Exploring the Best Benefits of Brow Lamination for Stunning Results

As we all know, beauty trends come and go much quicker than we can possibly keep up with them. Some of these trends stick around longer, making it so much easier to manage our beauty routines. However, there are others that end up being a complete waste of time, money, and energy, no matter how thrilling they seem to try out!

So, where does brow lamination stand in all of this? What is this eyebrow trend that’s popping up everywhere these days? Could it be the answer to finally achieving our ideal brow goals? Keep reading, and we’ll walk you through the entire process, step by step and the benefits of brow lamination. Additionally, we’ll cover the aftercare for the treatment and the incredible results you can expect to see!

What Is Brow Lamination?

Benefits of Brow Lamination

Brow lamination is essentially a perm but specifically designed for your eyebrows. This technique involves two special solutions that work to straighten the eyebrow hairs and hold them in place. The substances used are quite similar to those found in eyelash lift kits, which are commonly used by people when doing their own brow lamination at home.

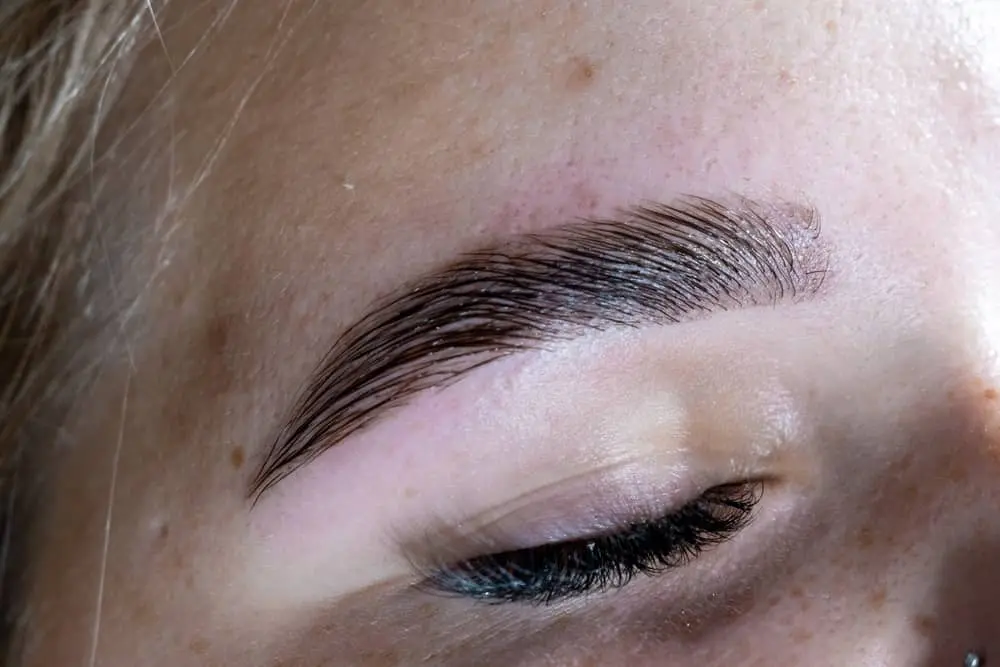
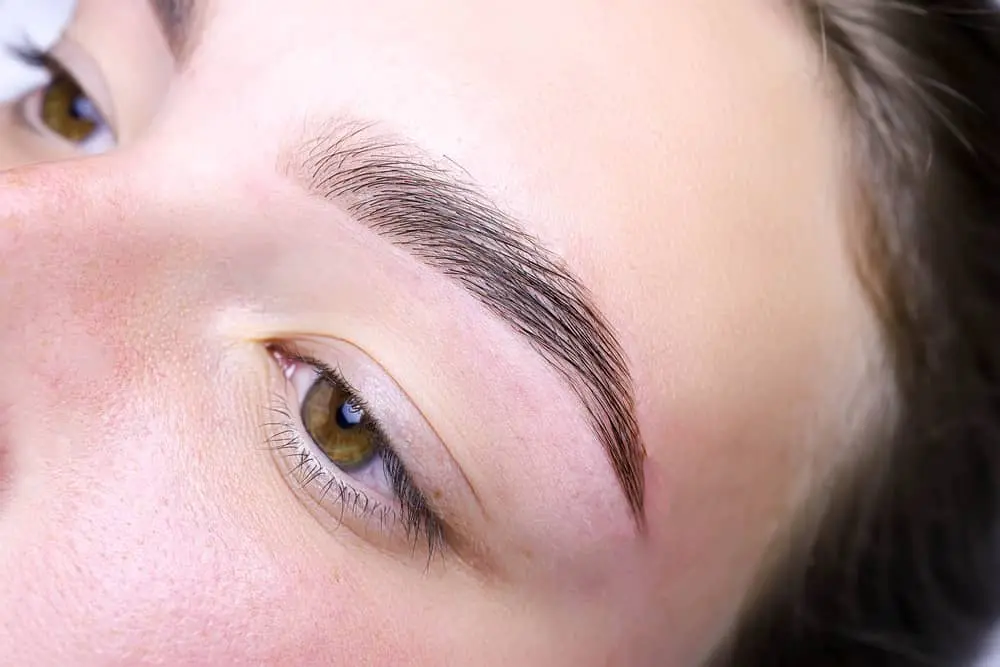
This treatment results in brows that appear wider, more lifted, beautifully shaped with an arch, and fluffier, too.

Goodbye Unruly Brow Hairs: How Does Brow Lamination Work?

Have you noticed an increasing amount of pictures with smooth and perfectly aligned brows appearing all over social media? If that’s the case, you’re likely looking at images of brows that have been laminated. Laminated brows are easy to spot because of the way their hairs are styled straight up and securely held in place.

The outcome is very similar to soap brows, which involves using soap instead of a traditional brow gel. (With this method, the soap is brushed through the eyebrows to create a smooth, glossy, and flawlessly styled appearance that stays intact all day long.)

So, what exactly does the brow lamination process involve? A certified brow specialist will perform what is essentially an eyebrow perm. The procedure works like a lash lift, but it’s entirely focused on your eyebrow hairs.

It’s a chemical treatment that begins with a lifting cream. This cream breaks down the bonds in each eyebrow hair, making them flexible and easy to mold during the next step.

After this, the brow technician combs the natural brow hairs upwards. They then secure them with a neutralizer that helps keep the brow hairs in their new, vertical position. Some hairs at the top may also be carefully trimmed to create the perfect shape.

Lastly, a deeply hydrating brow oil is applied to lock in moisture and nourish each hair strand. It ensures that your eyebrows remain healthy and shiny and prevents them from getting brittle or dry.

What Results Can We Expect After Eyebrow Lamination?

main benefit of brow lamination treatment is that it gives your brows a noticeably fuller appearance

The main benefit of brow lamination treatment is that it gives your brows a noticeably fuller appearance. Many people seek this effect, making it an excellent choice for people with thinning hair to achieve fuller-looking eyebrows.

Along with their new, fuller look, the brow hairs become easier to manage and style. Those with generally difficult-to-control brows can certainly appreciate how beneficial that is! That’s exactly why we highly recommend this treatment for brows that are unruly.

Who Is Brow Lamination Best for?

Anyone who enjoys the look of laminated brows is likely a perfect fit for this treatment! If you want your brows to appear cleaner, more lifted, or fuller, there’s absolutely no harm in giving it a shot. The process is gentle and non-invasive, meaning there is virtually no risk involved.

That being said, it’s truly incredible and a real game-changer for people with easily tangled eyebrow hairs. It smooths and straightens them, preventing tangling and keeping your brows looking neat and in place. For those with sparse brows, especially if the hairs are long and spaced evenly, it quickly makes them look much fuller–it’s as if you have thicker brows. This style works really well, whether your brows are sparse or thick.

Benefits of Brow Lamination

Brow lamination might be a solution for various issues you may experience with your eyebrows, including:

• hair thinning that tends to happen naturally as you get older

• sparse areas or gaps caused by too much plucking or waxing in the past

• unruly eyebrow types and stray hairs that refuse to stay in place even when brushed

• uneven brows or a lack of defined shape

In general, brow lamination is known to create the appearance of fuller and thicker eyebrows. Styling the hairs upward vertically can also give the impression that your brows are growing in new areas. Plus, the procedure is pain free, entirely noninvasive, and doesn’t involve any surgery.

Brow Lamination vs. Tinting vs. Microblading

Although brow lamination is amazing, it might not fix every problem with your eyebrows. For instance, if your brows have large gaps or are so uneven that brushing them up doesn’t make them appear more symmetrical, microblading might work better for you.

Microblading is a light kind of permanent tattooing that creates natural-looking, hair-like strokes to fill empty areas or reshape your eyebrows.

Another option is eyebrow tinting, where a gentle, safe dye is used to color your brow hairs. Unlike tinting, brow lamination doesn’t darken your brows. It could be your better choice if your eyebrows are light and hard to see.

The nice thing about eyebrow lamination is that it can be combined with tinting and microblading! In fact, if you’re doing tinting, you can have it done on the same day as your lamination session.

When thinking about microblading, it’s a good idea to have your brows microbladed first and then allow enough time to fully heal before laminating them.

You should always visit the same expert for both eyebrow treatments to ensure your brows look seamless.

brushed-up brows go out of style someday

How Long Does Brow Lamination Last?

If you properly care for your eyebrows, lamination can last several weeks. In other words, this is a semi-permanent procedure that takes some effort to maintain but saves you from frequent upkeep.

Thankfully, it’s not a permanent option, which is helpful if bold, brushed-up brows go out of style someday.

Brow Lamination Aftercare

Eyebrow lamination is one of the easiest beauty treatments to maintain. The most crucial thing is avoiding water on your brows for 24 hours after the session. That means no showering, washing your face, swimming, or getting wet in the rain.

Otherwise, water will undo the lamination process, causing your brows to go back to normal—wasting all the money and time you spent on the treatment.

Eyebrow lamination is one of the easiest beauty treatments to maintain

After the 24-hour mark, you can return to mostly your usual routine! Make sure to nourish your laminated brows with a mild oil to help counteract the slight negative effects of the perming solution.

If you already have a preferred hair or face oil, feel free to use that, and your regular face moisturizer can work just as well after the 24 hours are up.

Brushing your brows regularly will also help keep them in place as new hair growth gradually replaces the permed brow.

Unruly Brows No More: Is Brow Lamination Worth Considering?

Eyebrow lamination is a safe method that can provide you with naturally fuller-looking eyebrows in just a single session. It’s a more budget-friendly option compared to other brow treatments, unlike Microblading, and the results are appropriate and long-lasting. You might want to consider it if you’re looking for a fresh look that’s easy to maintain.

Not only that, but it’s currently very on trend, so now’s the right time to get your brows laminated if you want to try this look! Please reach out to us today to book your brow lamination appointment!

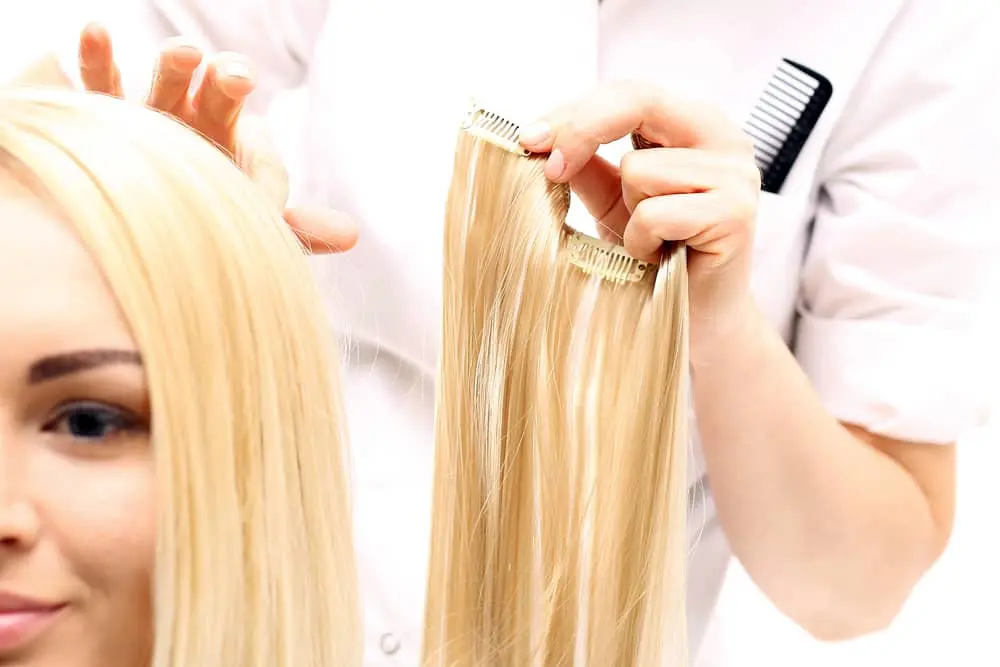
the lifespan of your hair extensions will largely depend on the type you select

How Long Do Hair Extensions Last: Taking Care and Maintaining Your Extensions

“How long do hair extensions last?” This is the most difficult question to answer and one we get asked all the time! The lifespan of human hair extensions relies on what products you use on them, how you take care of them, and, for clip-in extensions, how often you wear them.

The simple answer is that many factors come into play here, but one thing is clear: the lifespan of your hair extensions will largely depend on the type you select.

The material used to make the hair extensions you select is the most high-impact factor regarding how long they’ll last. Synthetic vs. human hair extensions are typically the first choice you’ll have to make, with synthetic ones usually being less expensive (but lasting a shorter period) than most human hair varieties.

When making such a hair change, it’s important to consider the aftercare process and what you’re getting for your money.

Here at On the Avenue Salon and Blowout Bar, we offer a fabulous range of real hair extensions, so you can be sure that you’re getting the best results and the right care for your hair.

Whether it is the first time you’ve considered hair extensions or are seeking advice after taking the plunge, we’re on hand to take you through how long hair extensions last and offer a handful of helpful hints and tips for maintaining your new head of hair. 

How Long Do Hair Extensions Last?

Human hair extensions of average quality usually last for 3 to 6 months

Human hair extensions of average quality usually last for 3 to 6 months, whereas synthetic hair extensions typically last between 1 to 2 months. The extensions can last up to 12 months if you take good care of your hair and use the fusion procedure.

While we can provide you with approximate durations for the life of your hair extensions, many more aspects affect the health of your strands. Human hair typically has a very long shelf life; however, since it is no longer connected to the scalp and requires different levels of maintenance depending on the wearer, we recommend that the hair lasts for three to six months.

Naturally, this is only a very general rule, and people who adhere to the proper maintenance and aftercare instructions can live considerably longer than this; conversely, improper hair extension care might shorten the lifespan of your extensions.

How To Take Care Of Hair Extensions

It’s not hard to take care of human hair extensions, but there are some things that you should keep in mind:

Install Properly

Proper application also influences the duration of hair extensions. An improper hair extension installation can lead to a variety of issues. It may produce friction, worsening the tangling and leaving you with an unsightly, disorganized mess.

Keep Your Hair Clean

Dirt and sweat can cause your hair extensions to tangle

Dirt and sweat can cause your hair extensions to tangle. To prevent this, wash them with sulfate—or paraben-free shampoo. Before shampooing, detangle your hair from the ends to the roots and wash it from the roots to the ends.

Ensure Your Hair Is Dried After Washing Or Swimming

Wet or damp hair can damage your extensions’ tape adhesive or bonds. As a result, it can be removed from your real hair.

Use Soft Bristle Brushes

Soft bristle brushes remove tangles while preventing damage to the tape adhesive. Start at the ends and work your way up. All brushing should be done in a downward, gentle motion to prevent putting too much tension on your hair extensions.

Brush Daily

The fact that even something as easy as brushing can greatly prolong the life of any extensions is crucial. Tangling, matting, and frizz are the main culprits behind hair damage. It can swiftly destroy extensions, leaving them ugly and useless. Regular brushing keeps the extensions tangle-free and in excellent condition.

Avoid Prolonged Sun Exposure, Chlorine, And Saltwater

They are the biggest enemies of human hair extensions. Sun exposure, chlorine, and saltwater can dehydrate hair, leading to dryness and tangles.

When swimming in a pool or beach, it is recommended that you wear swim caps or keep your hair in a ponytail or plait. If your extensions get wet, use shampoo and conditioner immediately.

Apply Conditioner to Your Hair Extensions Regularly

Using a conditioner makes your hair extensions shine and repairs your hair’s protective layer, the cuticle layer. When applying conditioner, focus on mid-lengths to ends to avoid your roots becoming too greasy.

Avoid Washing Your Hair Extensions Daily

Washing your hair extensions daily can dry them out. To keep them hydrated, wash them up to three times a week; however, this will depend on the thickness and the products you apply to them.

Make Sure Your Hair Is Completely Dry Before Bed

Tangles can develop when sleeping with wet human hair extensions. Certain hair strands may also tug on your natural hair, causing harm. Since your hair extensions are made entirely of human hair, you can blow-dry them. When you blow-dry them, the bonding won’t melt because they are heatproof. We suggest wearing your hair in a low ponytail or plait before bed to prevent tangling.

Dip Your Hair Extensions In Water With Diluted Shampoo

The easiest way to clean your hair extensions between applications and when they aren’t in your hair is to submerge them in water with diluted shampoo. Before soaking them:

  1. Comb your extensions a few times to remove any tangles.
  2. Submerge your extensions in the water for 10 minutes and move them from side to side to clean them properly.
  3. Never swirl your hair extensions in the water to prevent tangles from forming.

Rinse Your Extensions Under Cold Running Water

Running water helps remove dirt from your extensions. The cold temperature allows moisture to stay in the hair extensions and prevents them from drying out. After rinsing, squeeze them with your hands and place clip-ins on a clean towel to dry; for permanent methods, gently pat dry with a towel before blow-drying.

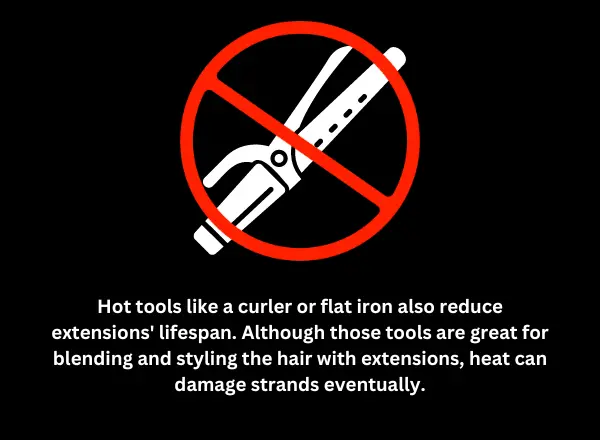
Don’t Overuse Hot Tools

Avoid using hot tools daily and note to spray some heat protectant before

Hot tools like a curler or flat iron also reduce extensions’ lifespan. Although those tools are great for blending and styling the hair with extensions, heat can damage strands eventually. Avoid using hot tools daily, and note that you should spray some heat protectant before.

We are aware that following a hair wash, everyone is frequently pressed for time! Women prefer things to dry quickly, and blow dryers are ideal for this. If you use extensions, we do urge you to use it less frequently. The lifespan of the extensions may be shortened and damage caused by frequent exposure to heat.

Do you want to do everything possible to keep your hair flawless and wearable for a long time? Then, avoid using the blow dryer and instead dry your tresses naturally.

Avoid Hair Dyes

Strong chemicals in hair dyes, particularly bleach, dry out hair and frequently result in breakage and thinness

We advise against using hair extensions if you want to be able to wear your hair longer than three months, even though you can dye and bleach them.

Strong chemicals in hair dyes, particularly bleach, dry out hair and frequently result in breakage and thinness. We understand that it’s enjoyable to switch out the color of your extensions, but consider the potential repercussions.

Conclusion

Even though hair extensions have a three to six month lifespan, damage can nonetheless occur during the first month. a reason for persistent over-drying, applying incorrect heat to straighten hair, failing to brush, and other habits. A number of our clients have managed to extend the life of their hair extensions by several months, bringing it closer to eight months.

Do you want to learn more about hair extensions or you want to schedule an appointment for hair extensions? Please reach out to us today!

Do you ever wish you could add some curl to your persistently straight lashes

What is a Lash Lift: What It Is, How It’s Done and The Benefits

Do you ever wish you could add some curl to your persistently straight lashes, but mechanical eyelash curlers just don’t work? Are you too impatient to endure getting lash extensions?

If so, a lash lift might be the perfect solution for you! So, what is a lash lift? In this article, we will talk about what a lash lift is, how it is done, its benefits, and a few tips on how to maximize your beautifully curled lashes.

What is a Lash Lift?

A lash lift could be a more convenient and cost-effective alternative to eyelash extensions, especially if you already have long eyelashes. Lash lifts use specially formulated, non-toxic chemicals on your natural lashes.

These chemicals are designed to break down the lashes’ structural bonds and reshape them. It’s similar to a perm for your eyelashes! This process allows your lashes to be curled from the base all the way to the tip, which makes them look longer and fuller. That’s a key point: while a lash lift adds curl to your lashes, it doesn’t increase length or volume. They simply seem to look longer and fuller due to the added curl.

What Happens During a Lash Lift?

What is a lash lift? Your lash lift experience starts with a consultation to evaluate your natural lashes

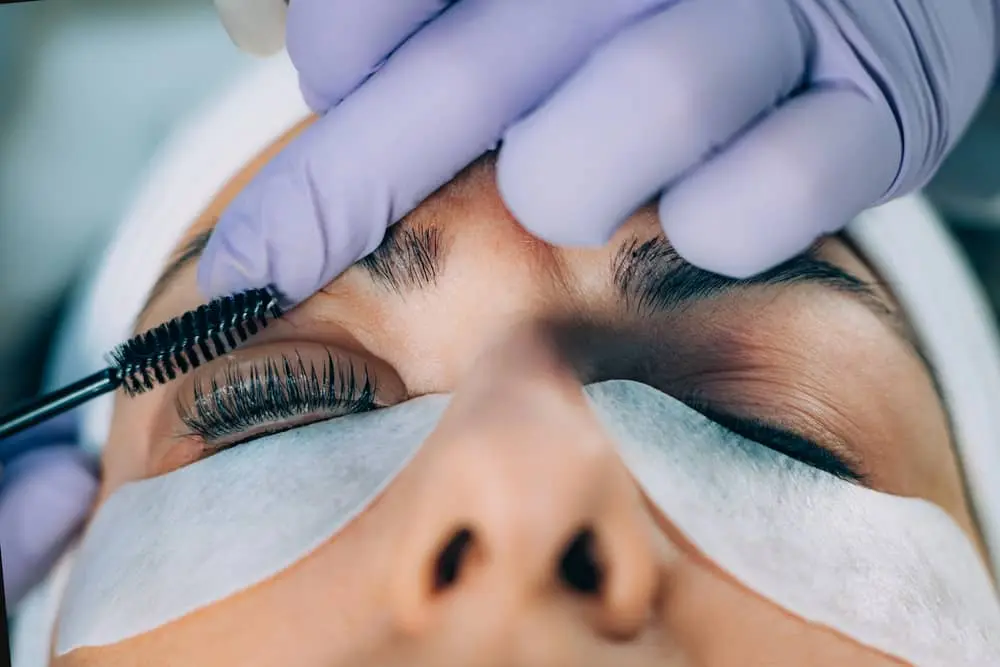
Your lash lift experience starts with a consultation to evaluate your natural lashes and discuss your beauty goals. This is the perfect opportunity to share your routine and desired results. Once your esthetician determines you’re a suitable candidate, they’ll select the right-sized shield to achieve your preferred lash style.

The treatment begins with cleansing the eye area and applying a lash lift shield along your lash line. A perming solution is then carefully applied to your lashes, curling them over the shield to your desired shape. This solution softens the bonds in your lashes, preparing them for a new curl. Your esthetician will monitor the timing closely to prevent over-processing.

A fixing solution sets the lashes in their new shape, ensuring your lift lasts up to 8 weeks. Finally, a nourishing solution with keratin proteins conditions and repairs your lashes, leaving them shiny, smooth, and protected.

The process takes 40-50 minutes, resulting in beautifully curled, longer-looking lashes.

Does a Lash Lift Work on Any Lash Type?

lash lifts are effective on all types of lashes

Yes, lash lifts are effective on all types of lashes, whether long, short, curly, or straight. They are particularly beneficial for lashes that grow straight. Adding a lash tint can enhance the effect by darkening your natural lashes, giving a fresh, mascara-free appearance for those looking for a darker lash look.

Should I Get a Lash Lift?

Short answer: Absolutely! Anyone with their own natural lashes can gain advantages from our lash lift treatment. Whether your lashes are short, long, or naturally curled, a lash lift can improve your appearance and shape your lash curl to better fit your natural features.

What are the Benefits of Lash Lifts?

Is a lash lift right for you? Check out a few more reasons to LOVE this service!

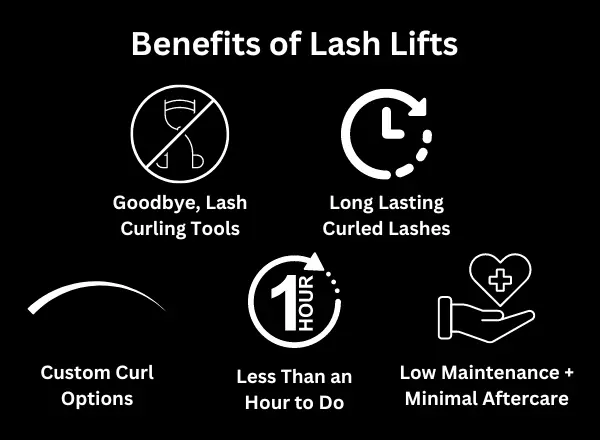
1. Goodbye, Lash Curling Tools

If you’ve been relying on a lash curler for many years, it’s now time to throw it away! A lash lift at one of our professional salons will provide you with that gorgeous curl without the trouble of dealing with an awkward tool, which often causes your curl to fade after just a few short hours. Say goodbye to those lash curler pinches in your future!

What are the Benefits of Lash Lifts

2. Long Lasting Curled Lashes

A lash lift stays effective for a lot longer compared to a fast curl from a curling tool or a swipe of mascara that claims to keep your lashes curled all day. We’re talking about six to eight weeks longer! (Yes, indeed, a lash lift can last up to eight weeks.) Prepare to enjoy a more streamlined beauty routine and a fresh new look that lasts significantly longer than the old lash curling techniques!

3. Custom Curl Options

Another great thing about a lash lift is giving your flat or straight lashes a custom look! You’ll work with an expert stylist to create a custom lash look with the curl just right for you and your preferences! Before starting the service, your stylist will evaluate the length of your natural lashes and then have a discussion with you to figure out your desired appearance and if you prefer a more gradual or a strong curl.

Once you make your decision, your stylist will choose the appropriate size silicone rod to provide the lift your heart or lashes truly desire.

Use your lash lift along with a lash tint to enhance and personalize your look even more! A tint deepens and strengthens your lashes with a tailored color to highlight your natural lashes beautifully.

4. It Takes Less than an Hour to Do!

A lash lift will not just change your life, but it’s also a speedy service that lasts around 40-50 minutes. So, lie down, unwind, and take a brief lash nap before you take on the rest of your day! After that, you don’t have to worry about curling your lashes until your upcoming lash lift session.

5. Low Maintenance + Minimal Aftercare

If you’re looking for a lash service requiring minimal maintenance between appointments, you’ve come to the right place. With a lash lift, there’s little at all you need to do to keep your new lift in check. The only thing that is a must is coming in every 6–8 weeks to refresh that lash lift!

What’s the Aftercare Like for a Lash Lift?

After receiving a lash lift, clients need to keep their lashes dry

After receiving a lash lift, clients need to keep their lashes dry for the initial 24-48 hours and adhere to any extra aftercare guidelines you provide as their technician. This generally involves staying away from heat, steam, oil-based products, and excessive rubbing or touching of the lashes.

To let the lift properly set, request your client to steer clear of steamy showers, swimming, baths, and saunas. They should refrain from applying makeup for the first 48 hours and use non-waterproof mascara only. Clarify that oil-based makeup might interfere with the solution, and recommend using a moisturizing serum to keep their lashes from becoming dry and brittle.

How to Maximize Your Next Lash Lift Appointment Results!

Using oil-based conditioners after the lash lift is not recommended. Applying oil-based mascara or castor oil will shorten the lash lift results by straightening them. Instead, use water-based mascara and oil-free eyelash-enhancing serum for thicker and fuller lashes. Following the aftercare routine and multiplying the lash lift effect with the lash serum will give you a natural ‘woke up like this’ appearance.

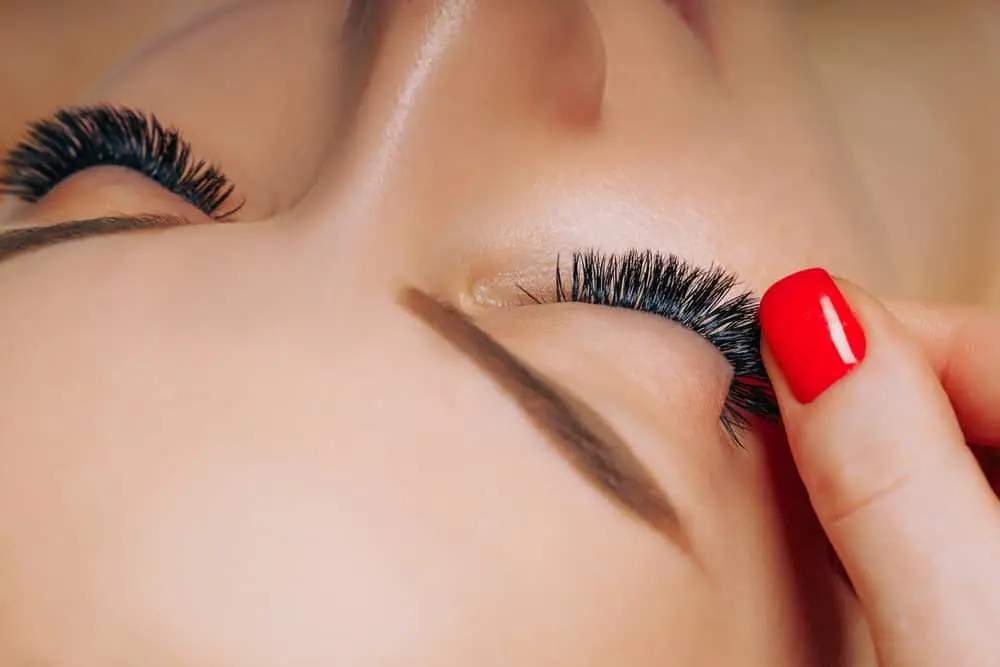
eyelash extensions have become so popular recently

How to Maintain Eyelash Extensions: Experts’ Top 5 Tips

Your eyelashes are more than just a means to protect your eyes. Darker, thicker, and longer eyelashes can define your eyes and enhance your facial features.

It is no wonder why eyelash extensions have become so popular recently. Women are now more practical and are looking for techniques to enhance their facial features without the constant need to look and feel good with makeup. Since they learned that lashes can make or break their look, more and more women are all in for eyelash extensions.

That said, knowing how to maintain eyelash extensions is as crucial as getting them in the first place.

Why Is It Important To Take Care Of Extensions?

How to Maintain Eyelash Extensions

There are numerous reasons why giving special attention to extensions is important, but it all boils down to a few main factors: cost, time, and the condition of your natural lashes. It’s straightforward: the more ragged they become and the faster they wear out, the more often you’ll need to return to get your lashes redone.

That can get expensive quickly, so it’s in your best interest to save money by keeping the lashes in tip-top shape and prolonging the time between appointments. The same applies to time – not many women have the time or the desire to go to the salon every week to get their lashes filled in or replaced. It’s not just the trip there and back that’s a bother; the appointment also takes a few hours. That’s time you can save by maintaining your lashes. Lastly, your natural lashes can get damaged if you don’t care for your extensions.

Here are a few of the top tips and tricks for basic care when you have just applied false eyelashes:

Before You Come In

Prepping for your lash extension application begins before you get to the salon. The lashes must be completely clean, dry, and without makeup. Ideally, they will not have any dirt, oil, or impurities on them and will be carefully combed through.

The First 24 Hours

The first 24 hours of eyelash extensions and onwards

When new lashes are just applied, it is important to leave them alone to settle in place. The adhesive is still bonding, and the lashes are still settling, so it is best to avoid touching them. It means avoiding tugging, pulling, rubbing, or anything that might move or otherwise shift the lashes or loosen the glue.

Another key point is that the lashes and your eye area must stay dry for 24 hours, ideally for the first 36 hours. This period is crucial for the extensions and glue, so it is important to avoid getting water on the face.

After The First 24 Hours

The extensions should be glued and cured once the first 24 hours are over, making them waterproof. Nevertheless, daily exposure to water (if you swim frequently, for example) or steam may affect their longevity.

How To Maintain Eyelash Extensions

Using the Right Products

When buying makeup products, ensure that they are NOT oil-based. Eyelash extensions are applied to your eyelid using a special non-toxic glue, which might break down when exposed to oils. So, to avoid the premature loss of your lashes, stay miles away from oil base eye and makeup products.

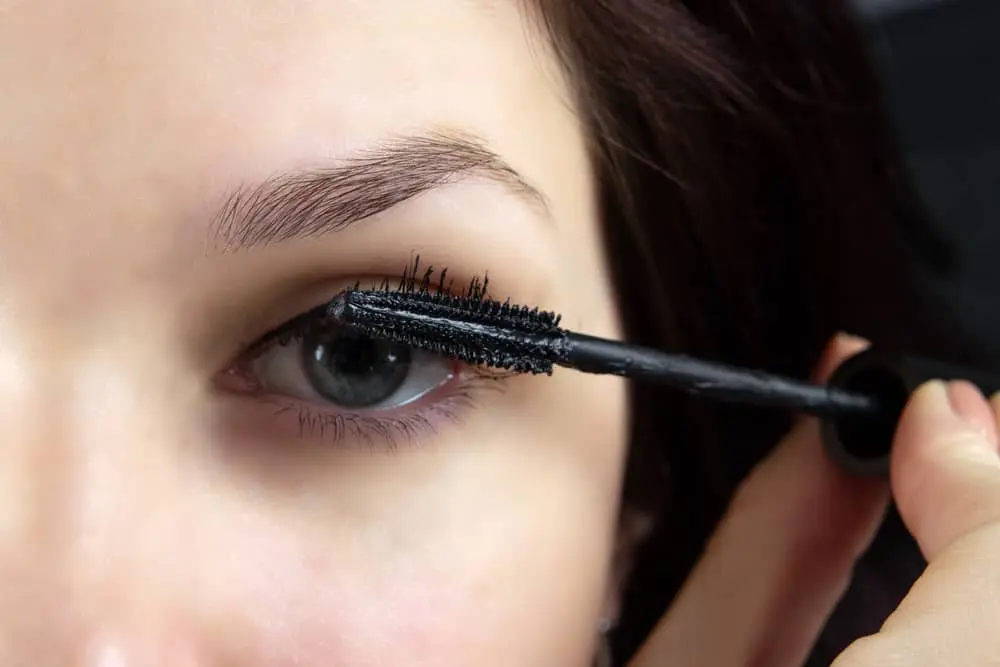
Avoiding Mascara

The product gets trapped between the extra lashes on your lash line

A full set of lashes makes a dramatic difference to natural lashes. However, it is understandable that you may want to ramp up the volume for weekends and special occasions. Using mascara, eyeliner, and other eye make-up products, however, is a big no-no. The product gets trapped between the extra lashes on your lash line, making it tougher to remove at the end of the day, thus causing your lashes to fall out prematurely.

Cleaning Your Lashes

Although you may feel that your eyelash extensions are fragile and shouldn’t be touched at all, it is very important to clean them daily. Your extensions should be cleaned daily to remove dirt, grease, and makeup residue that builds up over them. This not only keeps the follicles healthy but also prevents infections. Removing natural oils while cleaning will also help retain the lash glue.

Avoiding Picking On Them

When caring for your lash extensions, NEVER pick them out

When caring for your lash extensions, NEVER pick them out. When women pick out the extensions on their own, they also tend to pluck their natural lashes. If you aren’t satisfied with how they look or if it’s time for a redo, contact us to get them removed professionally. We have the expertise to pick out your extensions and retain your natural lashes without damaging them.

Brushing Your Lashes

Keeping long, fluffy, and tidy eyelashes requires some effort. When eyelash extensions crisscross, they exert pressure on one another, which might cause early lash shedding. To keep them full and beautiful, use a special lash brush daily. Now, you can show off your lashes without any worries at all!

To keep your lash extension application perfect, it needs some special lash extension aftercare to stay fluffy, gorgeous, and long-lasting. Just deal with them carefully and follow our lash technician’s instructions, and your lashes will remain beautifully intact for a long time.

Are you ready to let your eyes do the talking with voluminous and gorgeous lashes? Please book an appointment with us today!

Olaplex can significantly reduce breakage

The Secret to Fantastic Hair: What Does an Olaplex Treatment Do?

Each time you decide to color your hair, you are putting your strands at significant risk. Bleaching is particularly harmful. This is true if you’ve ever had crunchy, frizzy hair after going lighter. Olaplex provides a great solution. This specific treatment not only makes your hair appear and feel much healthier, but it also helps repair damage to individual strands. Indeed, you heard that correctly. Olaplex can significantly reduce breakage by mending broken bonds when applied in a professional salon setting.

What does an Olaplex treatment do? The substances in this amazing product repair damaged bonds at a molecular scale. Isn’t science fascinating? The primary component is bis-aminopropyl diglycol dimaleate. Even though it sounds complex, you don’t need to say this term to feel its effects. Olaplex focuses on the whole strand, from root all the way to tip. The outcome is softer, stronger hair that endures intense coloring and heat.

What Is Olaplex?

Olaplex is a line of hair repair, “bond-building” treatments that are getting buzz in the hair community, especially among people with damaged hair from excessive bleaching. It’s available in two forms: Olaplex can be combined with bleaching products to reduce damage, or just a standalone treatment. Numerous people with compromised hair have achieved fantastic results using Olaplex.

What Does Olaplex Claim To Do?

What Does an Olaplex Treatment Do

Olaplex says it can “repair broken disulfide sulfur bonds in the hair.” The treatment is labeled a “bond multiplier,” limiting hair damage during or after coloring.

Hair contains many keratin proteins, which contain the amino acid cysteine. Cysteine is unique since it has a sulfur (S) atom. Typically, two sulfur atoms join together to form a disulfide bond (S-S), establishing a link between two distinct proteins.

All these proteins that are holding hands are partly responsible for your hair’s general shape and strength. When hair undergoes perming or straightening, these bonds are intentionally broken into two SH (“free thiol”) groups, which are then reformed after the hair is styled into its new shape.

Re-forming these bonds often takes a few days (hence, do not wash your hair for a few days after perming, as it warps the shape).

The peroxide employed in the bleaching process may assist in fixing disulfide bonds… but ironically, it can also prevent these bonds from forming by attaching a sulfate group to the SH, leading to additional damage.

The Olaplex patent provides surprising detail about how it’s supposed to work. The short story is that both ends of bis-aminopropyl diglycol dimaleate connect with the sulfurs, creating an artificial, longer disulfide bridge.

In more detail, the “dimaleate” component of bis-aminopropyl diglycol dimaleate functions as Michael acceptors. In a Michael reaction, these react with an SH group to form covalent bonds.

So, a new disulfide link is created between the two sulfur atoms, which helps to strengthen the hair. This occurs quite rapidly—unlike hair straightening and perming, which occur faster than the peroxide capping reaction, resulting in significantly reduced hair damage during coloring.

The Five Stages of Olaplex

Here are the five stages of Olaplex in a nutshell:

1) Olaplex Number 1:

The first stage is the Olaplex bond multiplier, which can be used as a standalone treatment or mixed with color and put straight onto your hair in the foils. This concentrated initial salon step rebuilds broken disulfide bonds and begins preventing damage and repairing hair.

2) Olaplex Number 2:

After number 1, the bond perfector is put on after the color is rinsed. Number 2 is left on for 10-15 minutes to allow it to work its magic and fix all those broken bonds, resulting in the strongest, shiniest, and healthiest hair possible.

3) Olaplex Number 3:

The third stage is done at home—the hair perfector is a take-home treatment that is recommended to be used once a week. Number 3 is best applied prior to your shampoo and conditioner and left on for 10 minutes at the very least (but up to 30 minutes if you can!). The longer you can leave it, the better (Kim Kardashian swears by sleeping in hers overnight).

4) Olaplex Number 4:

The Olaplex bond maintenance shampoo can replace your regular shampoo and will help hydrate, strengthen, and top up your hair care at every wash. Designed to suit every hair type, Olaplex shampoo is made without sulfates and parabens and is safe for color-treated hair.

Thanks to the coconut oil-derived surfactant in the shampoo, it’s super bubbly, and a little goes a long way.

5) Olaplex Number 5:

A bond maintenance conditioner is also the final step in your Olaplex hair care treatment. Leave it on for three minutes before rinsing it off and enjoying the silky, well-moisturized hair you’ve always wished for.

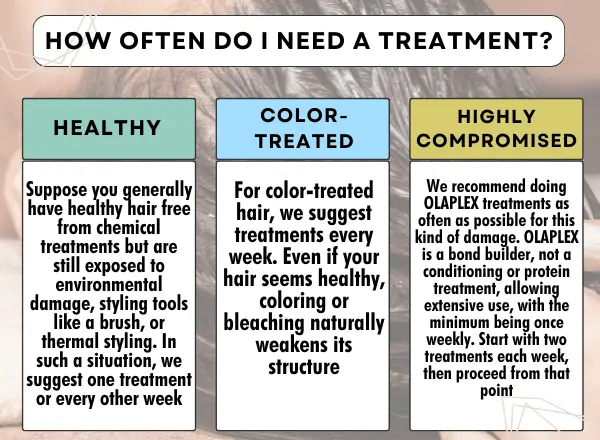
How Often Do I Need A Treatment?

You understand that you can use Olaplex at any time, but how frequently should your hair be treated? Even though each person’s hair is a unique canvas with specific needs, here’s a crucial guide to getting your hair in the best condition possible according to the damage level.

Healthy

Suppose you generally have healthy hair free from chemical treatments but are still exposed to environmental damage, styling tools like a brush, or thermal styling. In such a situation, we suggest one treatment or every other week. Even completely untouched hair can become healthier with proper care. You may fall into one or two categories, considering how damage can affect the hair. Using Olaplex for treatment can mend the damage between sessions in this scenario. It will not only repair the existing damage but also help keep the healthy hair you currently have, making it more resilient than ever before.

Color-treated

you can use OLAPLEX at any time, but how frequently should your hair be treated

For color-treated hair, we suggest treatments every week. Even if your hair seems healthy, coloring or bleaching naturally weakens its structure. That means that the hair must break first for chemicals to create color or textural changes in the hair follicle. Besides changing the color, you might style it using heat and risk exposing yourself to various damage.

Therefore, getting Olaplex treatments every week is essential to maintain the beauty of your colored hair! Pro tip: maintaining healthy hair allows the color to last longer, so it’s a double benefit.

Highly Compromised

Highly compromised hair can result from the hair being pushed too far chemically with color or texture services. It can also happen from consistently exposing your hair to heat styling tools, such as using a flat iron daily. This kind of damage can happen in various ways, and even dyeing your hair too frequently or undergoing extreme color or texture changes can lead to negative effects. We recommend doing Olaplex treatments as often as possible for this kind of damage.

Olaplex is a bond builder, not a conditioning or protein treatment, allowing extensive use, with the minimum being once weekly. Start with two treatments each week, then proceed from that point. Please pay attention to your hair and observe what it indicates it needs. If you are dealing with significant damage, you might also require additional treatments. Talk to your hairdresser for any other essential types of treatments.

Hairstylists everywhere praise Olaplex

Who Benefits from Olaplex?

Hairstylists everywhere praise Olaplex. Ask for this exceptional treatment if you bleach, highlight, or lighten your hair color. After a single application, your hair will be softer to the touch. Since it reduces the risk of breakage, you can color your hair without fear.

Olaplex isn’t solely for colored hair, though. It can also help prevent and lessen damage from chemical treatments and heat. Numerous stylists suggest using this treatment before getting a perm or a Brazilian blowout. It also helps reduce the likelihood of split ends caused by hairdryers and flat irons. Anyone who styles their hair can gain from this strand-saving product.

Highlights never seem to fall out of style

All About Highlights: What Are Face Frame Highlights?

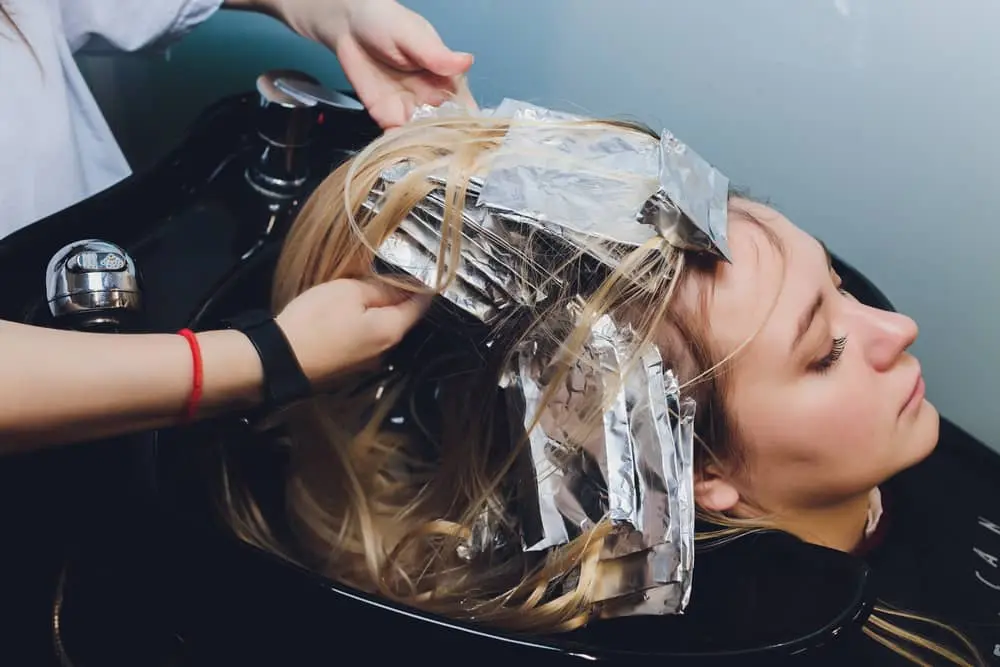
Highlights never seem to fall out of style. Indeed, highlights are an excellent way to give your hair color more dimension. But you might be wondering if you have other options if you want just a partial head of highlights. Try face-framing highlights. This could be your ideal highlight to add some contrast to your hair without a high-maintenance routine!

What are Face Frame Highlights?

What Are Face Frame Highlights

A face frame highlight is a highlighting technique that adds a pop of lightness and dimension while leaving a contouring effect. Including a brighter pop around the face can brighten up your color around the face. This technique is customized and personalized to each client. From copying sun-kissed highlights to creating a bold pop, this trend is versatile for everyone at any age. But before we start with which face frame highlights would suit you best, we need to figure out first what face frame you have.

Determining which face-framing style will look best on you can be tricky because they come in various shades and sizes. For first-timers, we always recommend dipping your toes first. What you see in images and how it appears on you can be so different. We advise deepening the root to soften the brightness directly on the face. First-timers might often feel “too bright” or “too light” when they first get a face frame. It’s the first thing your eyes notice because it is close to your hairline and face. If you adore the lightness, let’s enhance it on your next visit.

If you decide to change your mind after your service, there will be a charge if the face frame you picked doesn’t suit you.

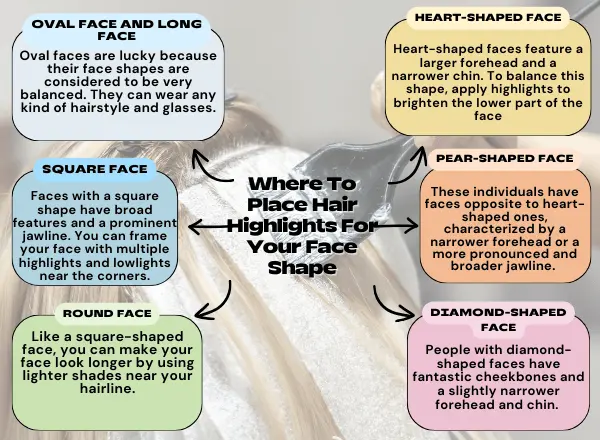
Where To Place Hair Highlights For Your Face Shape

Oval Face And Long Face

Oval faces are lucky because their face shapes are considered to be very balanced. They can wear any kind of hairstyle and glasses. For those with an especially narrow or long face, add volume and highlights to the side of your face near your ears to add width to your frame.

Square Face

Faces with a square shape have broad features and a prominent jawline. You can frame your face with multiple highlights and lowlights near the corners, creating many dimensions and layers. You can make your body appear longer by adding brightness above the head and using shading on the sides to soften the bold edge, creating a slimmer look for your face shape.

Round Face

Like a square-shaped face, you can make your face look longer by using lighter shades near your hairline. Also, apply darker colors under your ears towards the hair ends to add shadow to the sides of your face.

Heart-Shaped Face

Heart-shaped faces feature a larger forehead and a narrower chin. To balance this shape, apply highlights to brighten the lower part of the face while keeping the upper head slightly darker.

Consider balayage, a technique where highlights begin further down from the roots to achieve a soft and gradual appearance. This would also provide a smooth transition from shade to lightness, which will balance the outline of a heart-shaped face.

Pear-Shaped Face

These individuals have faces opposite to heart-shaped ones, characterized by a narrower forehead or a more pronounced and broader jawline. To soften this appearance, adding brightness around the upper part of the head and increasing volume at the crown can be effective.

Highlight placement can depend on your face frame

A reversed ombre or sun-kissed highlight at the top, where the color at the top is lighter than that at the ends, will soften and balance the look of the wider jaw.

Diamond-Shaped Face

People with diamond-shaped faces have fantastic cheekbones and a slightly narrower forehead and chin. To enhance this appearance, you can create balance by adding softness and fullness below the cheekbones.

Face Frame Highlight Ideas

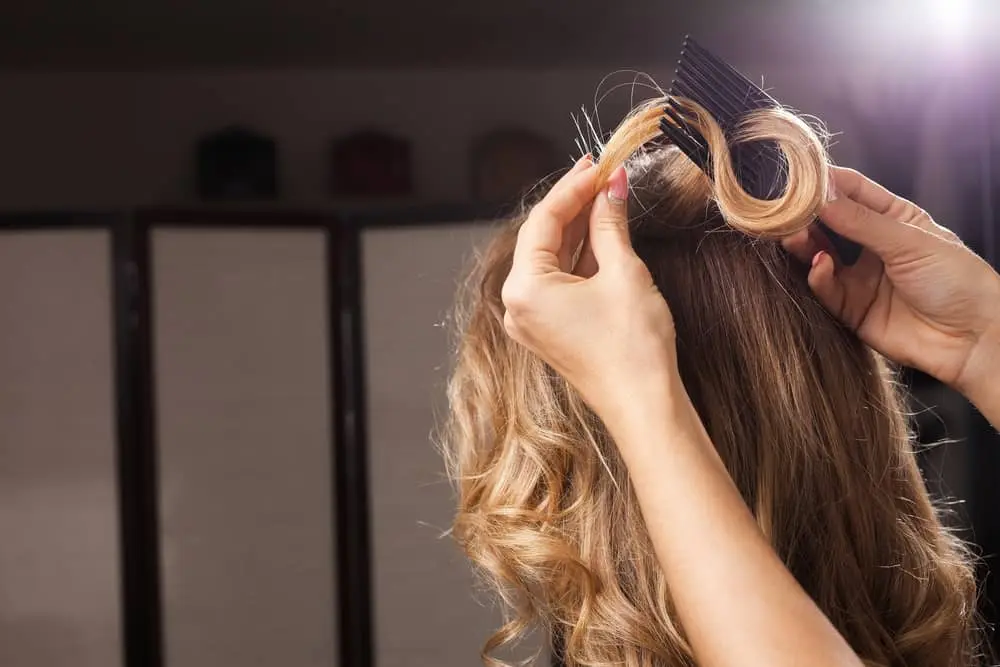
There are different techniques when applying highlights

Sun-Kissed Face Frame Highlights

This face frame is perfect for the natural babe who wants a “dust” of highlights to mimic that natural sun-kissed look.

Dimensional Blonde With Bright Face-Framing Highlights

This is for the babes who want some more contrast and pop. It’s a soft mix of lowlighting and highlighting, leaving that bright pop around your face to complement that look.

Blonde Face Frame Highlights

Are you already blonde? Do you need to be more blonde? This technique is great for girls who are already blonde but want to add that little extra oomph to their look. Adding a face pop around the hairline, just a shade lighter, can brighten your color. It gives you a lighter feel without harming the rest of your hair.

Level Up A Brunette Face Frame

We're all aware that brunettes can get a little bored

We’re all aware that brunettes can get a little bored with their hair. This is excellent for several reasons:

1: For those babes who’ve never gone lighter and maybe a bit scared, this technique is a great way to “feel how it looks” on your skin while keeping your old faithful color throughout.

2: For those babes who want to brighten up, the brunette customizes the shades and tones to have as much or as little contrast as the client wants.

Coppers & Reds Must Have

Bringing back Geri Halliwell’s Spice Girl era, this is a great way to customize any red or copper color. Add a pop of red or bright blonde to a soft peach blonde—anything goes with this one.

Fashion Pops

Last, face frames can also be customized using a bright or pastel color. You can have much fun changing your color scheme with a cute temporary color. Again, this can be as dramatic or soft as you like.

Key Takeaway

Face framing highlights is a coloring technique that brings out your features. This hair contouring is a coloring technique that combines free-hand application and highlighting paired with carefully positioning different depths and tones around the face to highlight and shadow targeted areas. Deeper shades create shadows, making the face look shorter or narrower.

On the other hand, lighter shades reflect light and make the face appear longer and more stretched out. This strategic use of color and the thoughtful choice of matching tones create a visual trick that enhances the definition of your face and highlights its features. Face framing is a 100% bespoke coloring service that is designed to suit your facial structure, features, and skin tone. The colors are selected based on your skin tone and positioned based on your features and structure.

If you want to try face frame highlights, going to professional hairstylists would be the best option. Please reach out to us today to learn more!

Blowouts are a new option that is much quicker, easier, and more efficient

Tips from the Experts: How Often Should You Get a Blowout?

Modern technology has enabled women to get the look they’ve always desired. This involves having silky, frizz-free hair. Previously, this required spending hours straightening their hair using a flat iron. Blowouts are a new option that is much quicker, easier, and more efficient. What is this treatment, and how often should you get a blowout? We’re about to find out!

What is a Blowout?

How Often Should You Get a Blowout

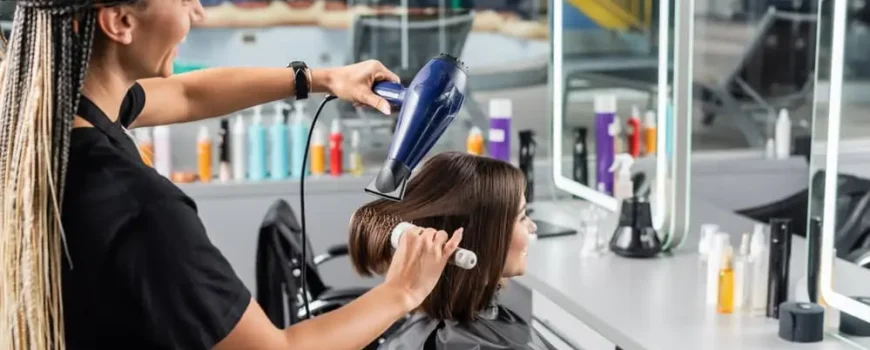
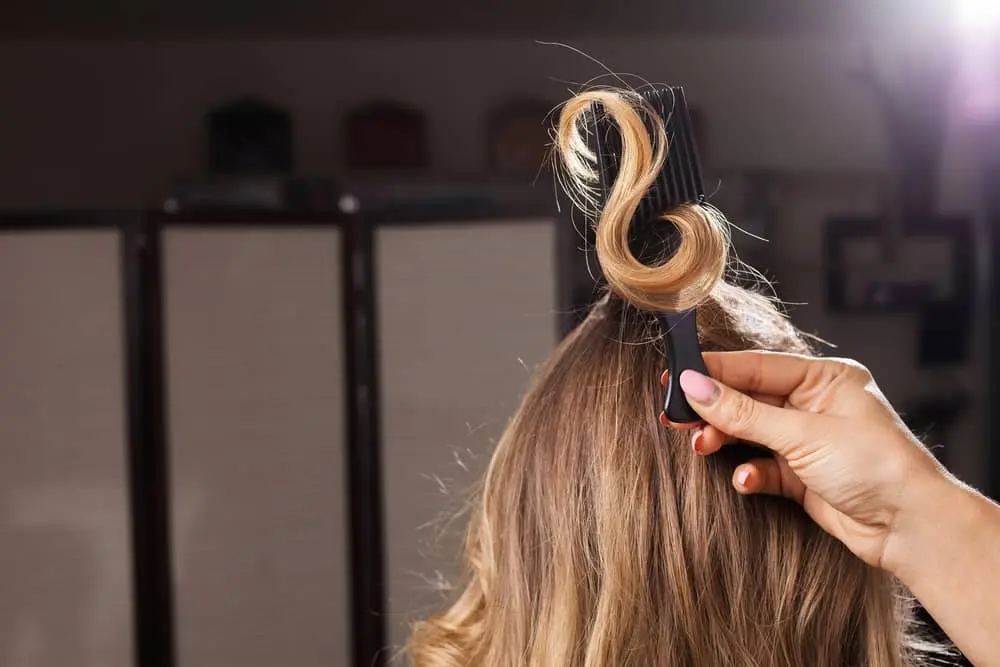
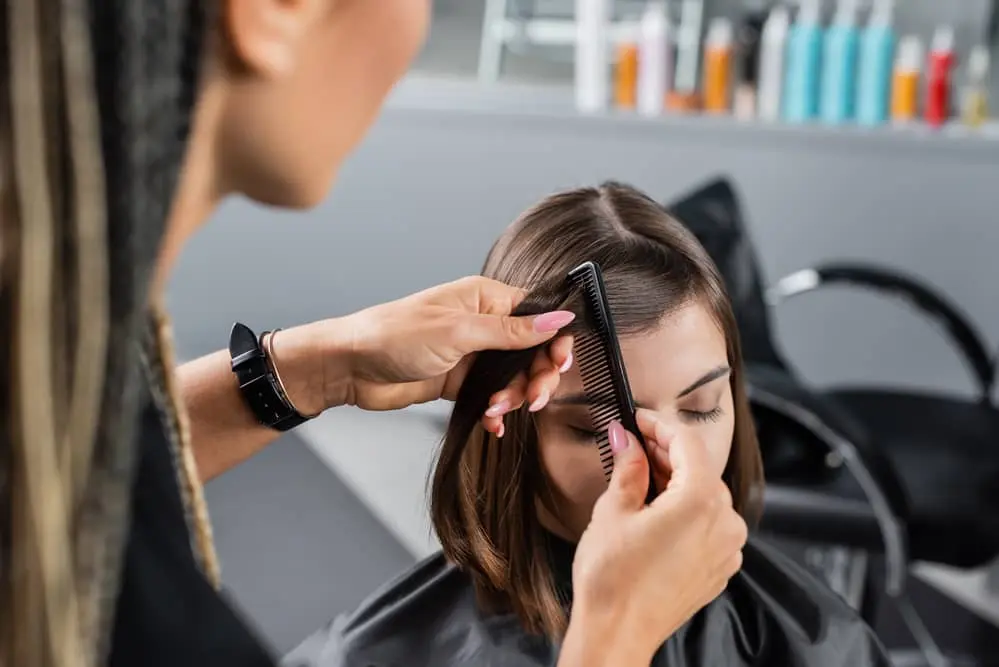
Many think a blowout is just a hair-drying session combined with a few styled curls. However, there is more to blowouts than these steps. For a blowout to be effective, the stylist must handle each section and skillfully turn wet hair into a dry work of art. The process usually uses a blow dryer and round brush, which involves lifting the hair from the scalp. Stylists aim to perfect the final look by lifting the hair off the scalp because natural oils can spread more evenly when the strands are apart.

Blowouts typically last two or three days without needing a retouch or do-over. People with textured hair benefit more from this process than those with thin hair, as styles can last up to a week on naturally curly hair.

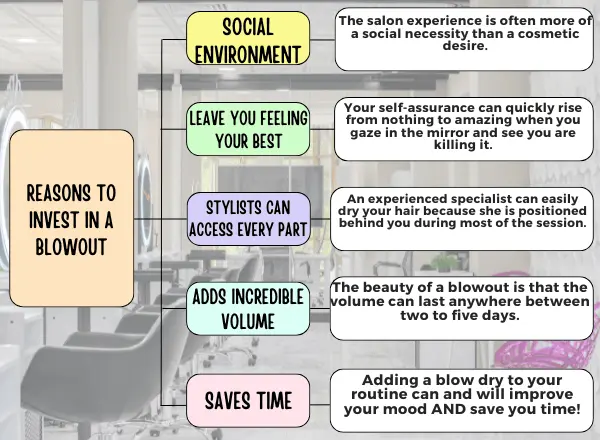
Reasons to Invest in a Blowout

Many women work extremely hard without thinking about spending time on themselves. Fortunately, a blowout can be one way to reduce stress effectively.

Stylists often combine therapeutic shampoo sessions with comforting scalp massages. Imagine the stresses of the day melting away—such is possible when you have a blowout.

The Typical Blowout Session Takes Place In A Social Environment

It’s evident that women mostly do not go to salons because they cannot do their hair for themselves. The salon experience could be as much of a social necessity as it is a cosmetic preference. You might enter a blow-dry bar feeling terrible about what’s happening in your life, but you can leave with a more positive outlook. The wonders of a blowout aren’t only surface-level; it’s also an inner experience.

A Blowout Can Leave You Feeling Your Best

Going to the salon and getting the perfect hairstyle is different. Your confidence can quickly rise from nothing to amazing when you gaze in the mirror and see you are killing it. A blowout is a great way to increase self-esteem before a job interview or a big proposal.

Hair Stylists Can Access Every Part Of Your Head

You may not believe that a blowout can change your entire mindset. However, you must acknowledge the stylist’s ability to comfortably hit all aspects of your head during a hair appointment. You might find it hard to blow dry the back of your head at home. An experienced specialist, on the other hand, can easily dry your hair because she is positioned behind you during most of the session.

Adds Incredible Volume to Hair

Bedhead can either be chic or very flat. The beauty of a blowout is that the volume can last anywhere between two to five days. That’s a big deal, especially for people with thin and flat hair. Why can’t your air-dry hair get the same volume as a blowout? It’s all about the heat and tension combo. Tension from the round brush and the heat from the blow dryer.

Saves Time

a blowout can be one way to reduce stress effectively.

Remember all the frustrating bad hair days you experienced (or barely avoided) this month. We will forever be indebted to high buns and bobby pins for saving us those days. Still, if you feel like you’re spending more days in ponytails than not due to running out of time to style your hair, arm fatigue from holding the blow dryer (oh, we know the burn), or hair isn’t your favorite thing to do, that’s when adding a blow dry to your routine can and will improve your mood AND save you time!

How Often Should You Get a Blowout?

We suggest getting a professional blowout once or twice weekly instead of styling your hair at home to achieve a sleek, professionally styled appearance that you’ll love. There are numerous advantages to professional styling.

It helps you save time. Styling your hair can take lots of time every morning, and depending on the style, it can take hours. Our professional stylist can shampoo, blow dry, and style your hair in about 30 to 40 minutes. You have better things to do every day than stand in front of a mirror trying to get that perfect curl.

What To Expect

If you're new to blowouts, you might wonder what happens during your first appointment

If you’re new to blowouts, you might wonder what happens during your first appointment. When you get to the salon, the stylist will inquire about your preferences and discuss the available blowout options. This session typically lasts 45 minutes and more than an hour, depending on the amount and length of your hair.

The hairdresser will start by washing and conditioning your hair. A few stylists might even give you a gentle scalp massage at this stage. Afterward, they’ll use a towel to dry your hair and remove extra moisture. They will then apply some product to detangle the hair before blow-drying it.

They will section your hair using clips so that they can work on it a little at a time. The hairdresser might use a round brush and a blow dryer (maybe with an attachment). Finally, they will apply extra products to enhance shine and maintain the style. Depending on your preference, they may straighten or curl the hair.

How To Make It Last

There are helpful tips to hep make you blowout last longer

To keep your blowout looking good for longer, follow these helpful tips:

  • Try not to touch your hair.
  • Keep your hair dry by wearing a shower cap and a headband during exercise. Use dry shampoo when your hair begins to get greasy.
  • Try putting your hair in a bun or loose ponytail before you sleep to keep your blowout looking fresh.
  • Try sleeping on a pillowcase made of silk or satin to reduce frizz in your hair.
  • Use hydrating spray if your hair looks duller after a few days.

Key Takeaway

Having a blowout can be a fantastic method to update your appearance. There are various types of blowouts and different add-ons that can accompany them. Ensure you communicate with your efficient stylist, like us at On the Avenue Salon and Blowout Bar, about what you want to get the best results. Now that you understand everything about blowouts and what they involve, you can give it a go! Please reach out to us for an appointment!